
You know that scene. You buy a beautiful, bright yellow bunch of bananas with the best intentions. You’re going to make smoothies! You’re going to eat a healthy snack! And then, life happens. A few days later, you’re side-eyeing a trio of bananas on your counter that have morphed into a spotted, mushy, fragrant version of their former selves. Your first thought might be, “Ugh, I should just toss them.”
Stop right there. My friend, you are not looking at failure; you are looking at destiny. You are moments away from the warm, spiced, melt-in-your-mouth glory that is homemade banana bread. This isn’t just a recipe; it’s a transformation. It’s alchemy for the soul, turning potential compost into a masterpiece. And I’m here to walk you through it, step-by-step, like a friend chatting with you over a cup of coffee. No chef jargon, no intimidating techniques—just straightforward, can’t-mess-it-up goodness. Ready? Let’s turn those sad bananas into the star of your kitchen
1. Why This Recipe is Your New Best Friend
Okay, so why should you trust me with your precious, overripe bananas? IMO, not all banana bread recipes are created equal. Some are dry. Some are bland. Some are so dense you could use them as a doorstop. We are not making doorstop bread today.
This recipe is the one I’ve landed on after years of tweaking. It’s the Goldilocks of banana bread—perfectly moist, perfectly sweet, and with a crumb that’s tender but still has a bit of substance. It’s the kind of recipe you’ll scribble down on a notecard and pass on to your kids. Dramatic? Maybe. True? Absolutely.
Here’s the real kicker: this is arguably the easiest baked good you will ever make. Seriously. You don’t need a fancy stand mixer. You don’t need to sift a million things. If you can mash a banana and stir a bowl, you are 100% qualified for this job. It’s forgiving, it’s flexible, and it fills your home with an aroma that is basically a warm hug. Who doesn’t need more of that?
2. What You Will Need in the Kitchen (The Gear)
Before we get to the ingredients, let’s talk tools. Don’t worry, we’re keeping it simple. You probably have everything already.
A Large Mixing Bowl: This is your main stage. Go for a decently sized one so you have room to stir without flinging batter everywhere. 🙂
A Loaf Pan (9×5 inches is ideal): This is the classic shape. If you only have an 8×4, that’s okay! Your bread will just be a bit taller and might need a few more minutes in the oven.
A Fork or Potato Masher: For the highly technical banana mashing operation.
A Whisk or a Spatula: A spatula is actually my go-to. It’s great for folding and making sure you scrape every last bit of deliciousness into the pan.
Measuring Cups and Spoons: For, you know, measuring stuff.
Parchment Paper (optional but highly recommended): Lining your pan with a sling of parchment paper is a game-changer. It guarantees your bread will slide out effortlessly. No more wrestling with a stuck loaf!
See? Nothing crazy. No stand mixer required, though you can use one if you’re feeling fancy. I usually just go with good old-fashioned elbow grease.
3. Ingredients You’re Going to Need
Here’s where the magic happens. This is your shopping list, but chances are, you’ve got most of this in your pantry right now. FYI, using really ripe bananas is non-negotiable. The blacker and spottier, the better. They’re sweeter and pack more flavor. Green-tipped bananas need not apply.
The Wet Team:
3 very ripe bananas: This is about 1 ½ cups mashed. The riper, the better!
½ cup (1 stick / 113g) unsalted butter, melted: Or use salted and just reduce the added salt a tiny bit. I like the control of unsalted.
¾ cup (150g) packed brown sugar: Light or dark is fine. Dark will give a deeper, almost molasses-like flavor.
2 large eggs: Let them come to room temperature if you can. They incorporate better, but if you forget (I always do), it’s not the end of the world.
1 teaspoon vanilla extract: The good stuff. It makes a difference.
The Dry Team:
2 cups (250g) all-purpose flour: Spoon and level it into your measuring cup to avoid packing in too much. Too much flour = dry bread.
1 teaspoon baking soda: This is our leavening agent, our rise-maker.
½ teaspoon salt: Crucial for balancing the sweetness. Don’t skip it!
1 teaspoon ground cinnamon: The quintessential cozy spice.
The Fun Mix-Ins (Choose Your Own Adventure!):
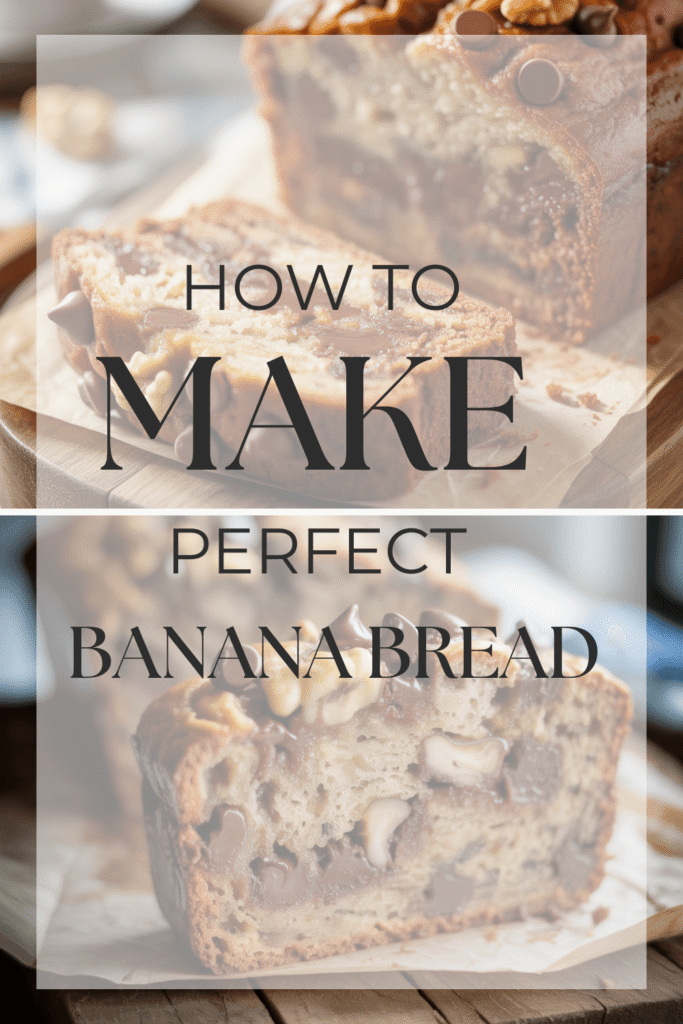
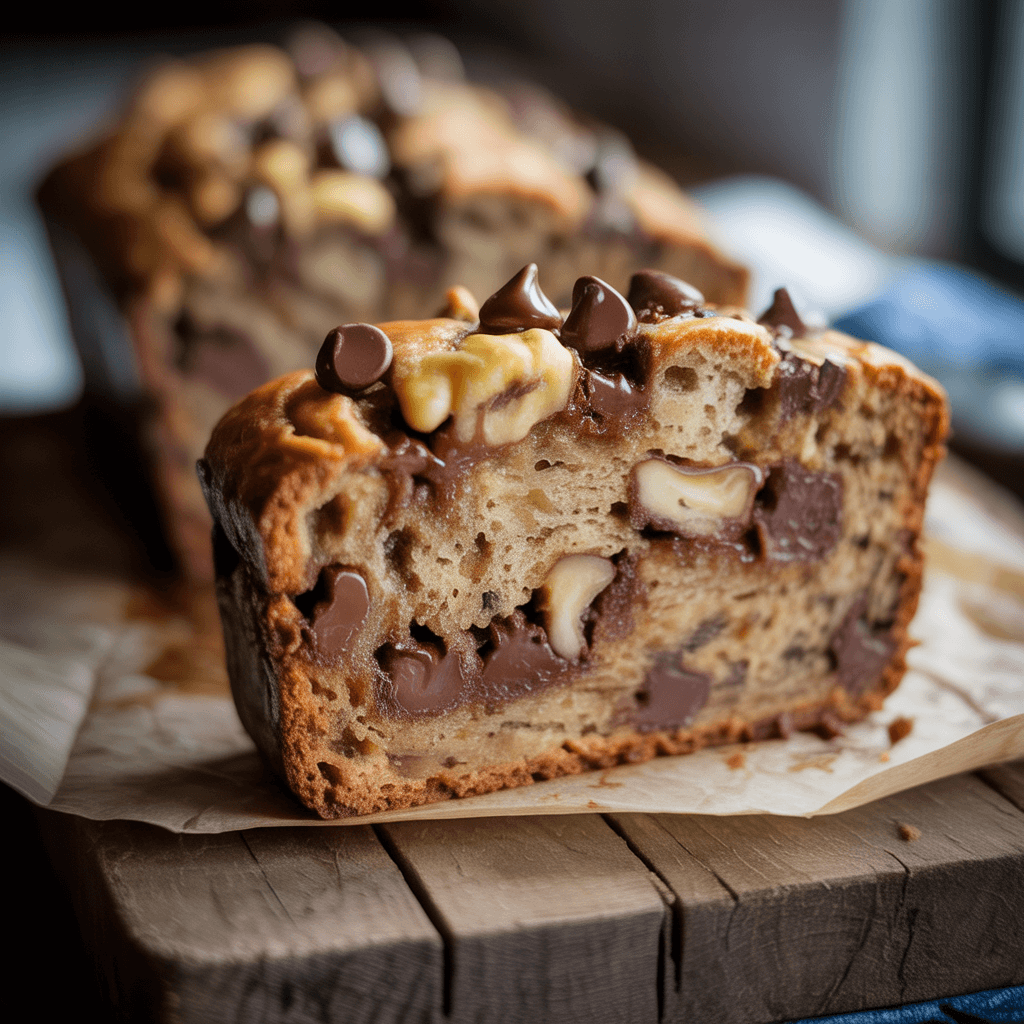
1 cup of chocolate chips: Semi-sweet are classic, but dark or milk work too.
1 cup of chopped walnuts or pecans: For a lovely crunch.
A combination of both! This is my personal favorite.
4. Your Step-by-Step Guide to Banana Bread Glory
Alright, preheat that oven to 350°F (175°C). Let’s get this party started. I’ll walk you through it like you’re right here in the kitchen with me.
Step 1: Prepare Your Pan
First things first, let’s avoid a sticky situation later. Grease your 9×5 loaf pan with a little butter or non-stick spray. If you’re using parchment paper, cut a strip that fits the length of the pan with some overhang on the two sides. This will act as a sling to lift the baked bread out. Trust me, it’s a pro move that makes you look like a baking wizard.
Step 2: Mash Those Bananas
Peel your very ripe, probably embarrassingly soft bananas and plop them into your large mixing bowl. Take your fork or potato masher and go to town. You want them mostly smooth, but a few small lumps are totally fine—they add little pockets of banana flavor. Think of it as stress relief.
Step 3: Combine the Wet Ingredients
To the banana mash, add your melted (and slightly cooled) butter, brown sugar, eggs, and vanilla extract. Now, grab your whisk or spatula and mix it all together until it’s well combined. It might look a little grainy from the sugar, and that’s perfectly normal. You’re doing great.
Step 4: Whisk the Dry Ingredients
In a separate, smaller bowl, whisk together your flour, baking soda, salt, and cinnamon. This is an important step—it ensures the baking soda and salt are evenly distributed throughout the flour, so you don’t get a bitter bite in one piece of bread. See? We’re being thorough, but it’s still easy.
Step 5: Bring It All Together
Here’s where we need a gentle touch. Add the dry ingredients to the wet ingredients. Using your spatula, gently fold the mixture together. What does “fold” mean? It just means you’re cutting through the center of the batter, sliding along the bottom of the bowl, and turning the mixture over on itself. Mix until the flour is just incorporated. A few streaks of flour are okay! Seriously, stop mixing the second you don’t see dry flour patches. Overmixing is the enemy of tender banana bread—it develops the gluten in the flour and makes it tough.
Now, fold in your chocolate chips or nuts, if you’re using them.
Step 6: Bake to Perfection
Pour the batter into your prepared loaf pan and smooth out the top with your spatula. You can even sprinkle a few extra chocolate chips on top for a pretty finish.
Slide the pan into your preheated 350°F oven and set your timer for 55-60 minutes. But here’s a secret: ovens lie. They have tempers and hot spots. So, start checking around the 50-minute mark. The classic test is to insert a toothpick or a thin knife into the center of the loaf. If it comes out with a few moist crumbs clinging to it, it’s done. If it comes out with wet batter, it needs more time. If it’s completely clean, you might be slightly overdone, but it’ll still be delicious.
Step 7: The Hardest Part—Waiting
Once it’s done, take the pan out of the oven and place it on a wire rack. Let it cool in the pan for at least 15-20 minutes. I know, the smell is intoxicating and you want to dive in. But if you try to take it out now, it might fall apart. We’ve come too far for that! Let it set up.
After it’s cooled a bit, use the parchment paper sling or carefully run a knife around the edges to loosen it. Then, turn it out onto the wire rack to cool completely. Can you cut a warm slice? Of course you can. It might be a little crumbly, but sometimes that’s a price worth paying. 🙂
And there you have it. You’ve just transformed those forgotten bananas into a thing of beauty. Slice it thick, maybe add a little smear of butter, and pat yourself on the back. You didn’t just make banana bread; you mastered a little piece of kitchen magic. Now, go forth and bake! And maybe, just maybe, let a few bananas go spotty on purpose next time.

