

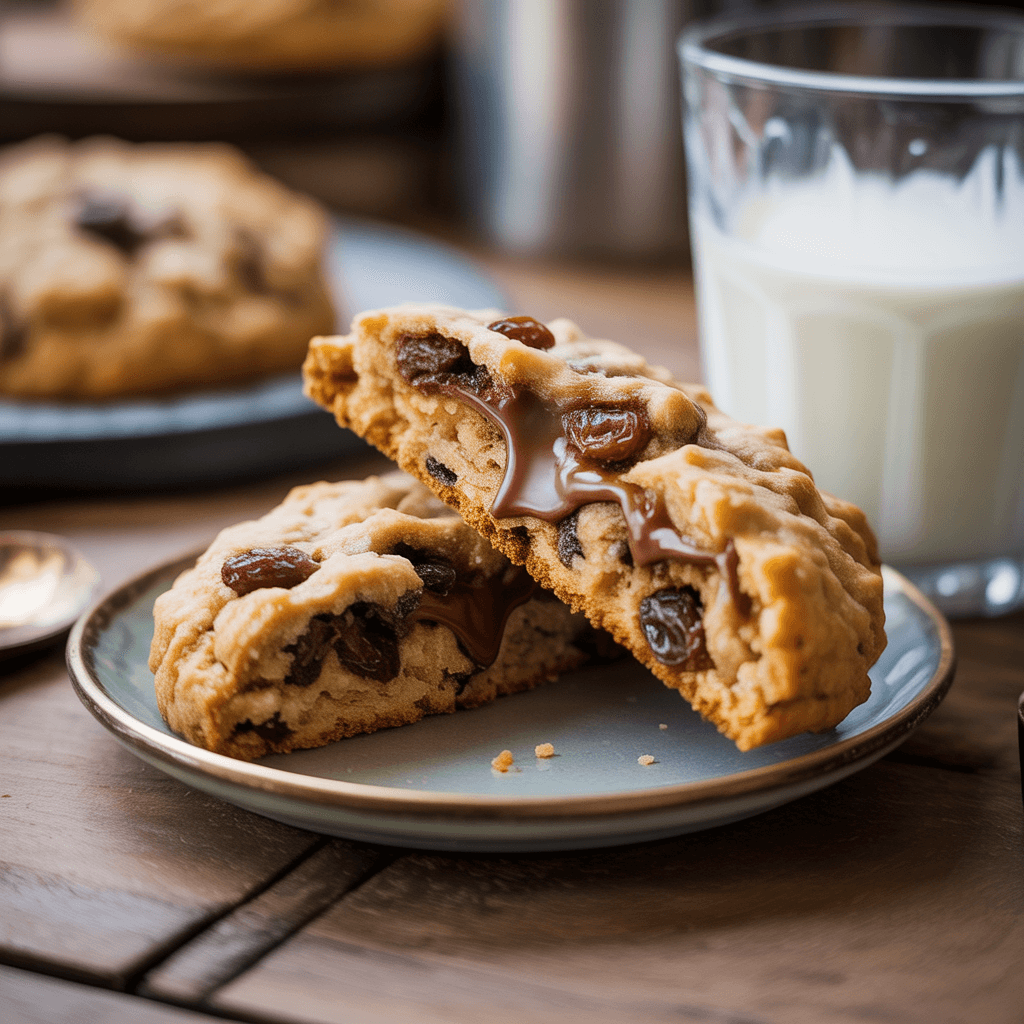
You know that feeling? You get a craving for something warm, comforting, and just a little bit nostalgic. Your mind drifts to the idea of a perfect cookie—one that’s crisp around the edges, gloriously chewy in the center, and packed with wholesome, oaty goodness and sweet, plump raisins. And then you think, “Nah, I’ll just buy some.” My friend, I am here to tell you that the store-bought version is a sad, crunchy imposter compared to the glorious creation you can make in your own kitchen.
Making oatmeal raisin cookies from scratch is one of life’s simple, profound pleasures. It’s not just baking; it’s therapy that ends with a plate of warm cookies. This isn’t a fussy, complicated recipe. It’s a straightforward, no-nonsense guide to achieving cookie nirvana. So, preheat your emotional support oven, and let’s get to it.
1. Why This Recipe is Your New Best Friend
Look, I’ve tried a lot of oatmeal raisin cookie recipes. Some spread into one giant, thin sheet on the pan. Others turn into dry, crumbly hockey pucks. It’s a tragedy, really. After much delicious (and sometimes disappointing) research, I’ve landed on a formula that consistently delivers what I’m looking for: that perfect chewy texture with a deep, caramel-like flavor.
Why should you trust me with your butter and sugar? Because I’ve done the hard work for you. This recipe uses a few simple, smart techniques to guarantee a win. We’re not just mixing ingredients; we’re building flavor and texture from the ground up. The result is a cookie that’s hearty without being heavy, sweet but not cloying, and has that satisfying chew you dream about.
Ever wonder why some cookies taste flat and one-dimensional? We’re going to fix that. We’re going to coax out every bit of flavor potential from our ingredients. IMO, a homemade oatmeal raisin cookie is a small act of self-care. Plus, your kitchen will smell absolutely incredible. It’s a win-win.
2. Gearing Up: Your Kitchen Toolbox
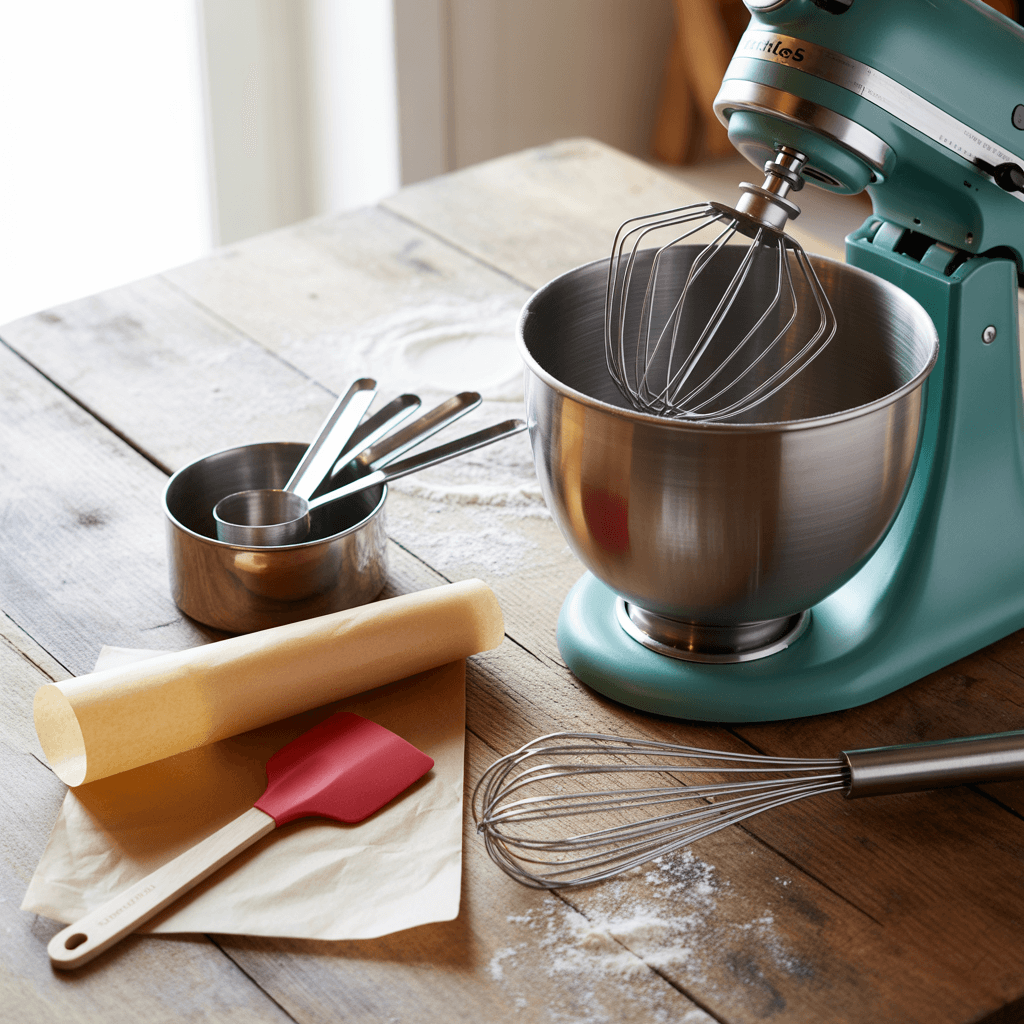
You don’t need any fancy, single-use gadgets for this. If you have a basic kitchen setup, you’re golden. Let’s take a quick inventory of the essentials. Seeing everything laid out before you start is a game-changer—trust me on this.
Two Baking Sheets: You’ll want to bake in batches, so two is the magic number.
Parchment Paper or Silicone Baking Mats: This is non-negotiable for me. It prevents sticking and makes cleanup a five-second job. No more scrubbing pans!
A Stand Mixer or Electric Hand Mixer: You can absolutely do this by hand with a wooden spoon and some elbow grease, but a mixer makes creaming the butter and sugar so much easier. Your arm will thank you.
Two Mixing Bowls: One for your wet ingredients and one for your dry. Keeping them separate until the right moment is a key step.
Measuring Cups and Spoons: For accuracy. Baking is a science, after all.
A Whisk and a Spatula: The whisk for your dry ingredients, the spatula for making sure you get every last bit of delicious dough out of the bowl. 🙂
That’s it! See? Nothing crazy. Now, let’s talk about the stars of the show.
3. The Cast of Characters: Your Ingredient List

Gather these ingredients. Using the good stuff here really does make a difference. I’ll give you my two cents on a few of them.
Dry Ingredients Team:
1 ½ cups (190g) All-Purpose Flour
1 teaspoon Baking Soda
1 teaspoon Ground Cinnamon
½ teaspoon Salt – Do not skip this! It makes the sweet flavors pop.
Wet Ingredients & Friends Team:
1 cup (2 sticks or 226g) Unsalted Butter, at room temperature – This is crucial. Soft, but not melted.
1 cup (200g) Light Brown Sugar, packed – This is the secret to chewiness and that caramel flavor.
¼ cup (50g) Granulated Sugar
2 large Eggs – Also at room temperature, if you can plan ahead.
1 tablespoon Pure Vanilla Extract
The Main Event:
3 cups (270g) Old-Fashioned Rolled Oats – Do not use instant or quick-cook oats. They turn to mush. We want texture!
1 ½ cups (225g) Raisins – I’m a purist, but feel free to use a mix of raisins and dried cranberries for a twist.
FYI: Why room temperature butter and eggs? It allows the ingredients to emulsify and create a smoother, more cohesive dough. If your butter is cold, you’ll overwork the dough trying to cream it, and that can lead to tough cookies. If you forgot to take your butter out, no panic! You can quickly bring it to the right consistency by cutting it into tablespoons and letting it sit on the counter for 20-30 minutes.
4. The Main Event: Your Step-by-Step Cookie Guide
Okay, the fun part. Let’s make some magic. Follow these steps, and you’ll be a cookie hero in no time.
Step 1: The Pre-Game (Aka, Preheat and Prep)
Before you do anything else, preheat your oven to 350°F (175°C). Ovens lie, people. Giving it plenty of time to come to the right temperature is the first step to baking success.
While it’s heating, line your baking sheets with parchment paper or silicone mats. No greasing needed. Set those aside.
Step 2: Assemble the Dry Team
Grab one of your mixing bowls. This is where we get the dry crew together.
Whisk together the 1 ½ cups of flour, 1 teaspoon of baking soda, 1 teaspoon of cinnamon, and that all-important ½ teaspoon of salt.
Whisk it until everything is evenly distributed. You’re basically ensuring there won’t be a pocket of pure baking soda in one cookie. (Not a pleasant surprise.)
Set this bowl aside.
Step 3: The Butter and Sugar Show
Now, take your stand mixer bowl or a large bowl if you’re using a hand mixer. Add your room-temperature butter, packed brown sugar, and granulated sugar.
Beat them together on medium speed for a good 2-3 minutes. You’re not just mixing; you’re “creaming.” This process incorporates air into the dough, which helps the cookies rise.
Stop and scrape down the sides of the bowl. You want to make sure everything is getting to know each other.
Keep beating until the mixture becomes noticeably lighter in color and fluffy. See? We’re already building texture.
Step 4: Bring in the Wet Squad
With the mixer on low, add your eggs one at a time, letting the first fully incorporate before adding the second.
Then, pour in that tablespoon of vanilla. Yes, a full tablespoon. It seems like a lot, but it adds a beautiful depth of flavor that imitation vanilla just can’t match.
Mix until everything is smooth and creamy.
Step 5: The Grand Union
Remember that bowl of dry ingredients? It’s time to introduce it to the wet party.
With the mixer on low, gradually add the dry ingredients to the wet. Mix until just combined. Do not overmix! As soon as you no longer see streaks of flour, stop. Overmixing develops gluten and makes cookies tough. We want tender, chewy cookies, not little bricks.
Now, turn the mixer off. We’re going to finish this by hand with a spatula. It’s more gentle.
Step 6: The Finale – Oats and Raisins
This is it. The moment we’ve been waiting for.
Add the 3 cups of old-fashioned oats and the 1 ½ cups of raisins to the bowl.
Use your spatula to fold them in gently. Make sure they’re evenly distributed throughout the dough.
See how the dough feels? It’s thick, a little sticky, and smells amazing. That’s the smell of success.
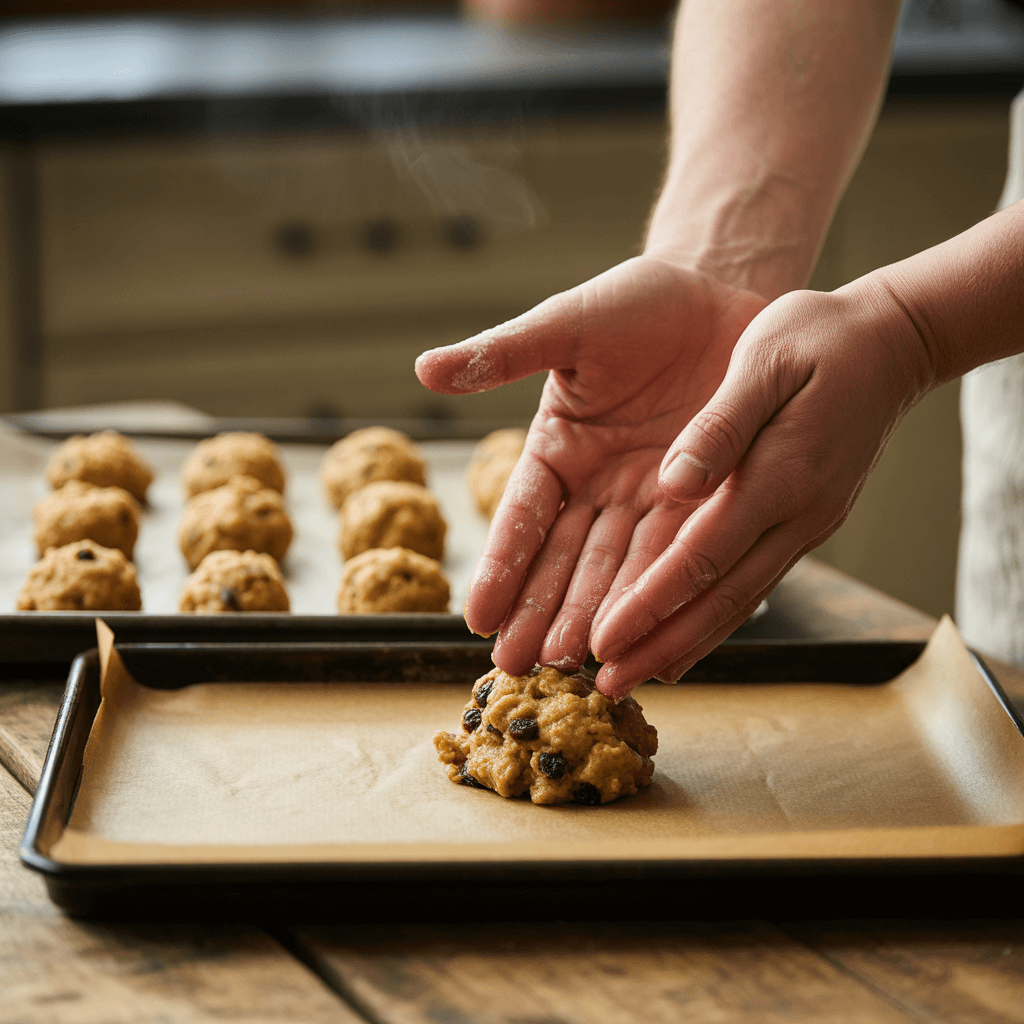
Step 7: Scoop and Space
Using a cookie scoop or a couple of tablespoons, drop rounded balls of dough (about 2 tablespoons each) onto your prepared baking sheets.
Leave about 2 inches between each dough ball. These cookies need room to spread and breathe. If you crowd the pan, you’ll get one giant cookie blob. It might still taste good, but it won’t be pretty.
I usually fit about 12 cookies per standard-sized sheet.
Step 8: Bake to Perfection
Slide one baking sheet into your preheated oven and set a timer for 10-12 minutes.
You’re looking for golden brown edges and the centers that still look just a tiny bit soft and underdone.
The cookies will continue to cook on the hot baking sheet after you take them out. This is the secret to a soft, chewy center!
Let the cookies cool on the baking sheet for 5 minutes before transferring them to a wire rack to cool completely. This step requires patience, but it’s what keeps them from falling apart.
While the first batch is cooling on the sheet, pop the second one in the oven.
And there you have it. You’ve just created a batch of absolutely killer oatmeal raisin cookies. The kind that make people ask for the recipe. The kind that make your house feel like a home.
So, what are you waiting for? Go pour yourself a tall glass of milk, grab a couple of cookies while they’re still warm, and take a well-deserved bite. You’ve earned it. Happy baking

